
Wiring Inspection
If any wiring is poor, replace the damaged wiring.
If the connector is corroded or dirty, clean it carefully. If it is damaged, replace it.

Use the wiring diagram to find the ends of the lead which is suspected of being a problem.
Connect the hand tester between the ends of the leads.
Special Tool - Hand Tester: 57001-1394
Set the tester to the × 1 Ω range, and read the tester.
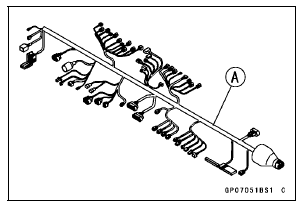
If the tester does not read 0 Ω, the lead is defective. Replace the lead or the wiring harness [A] if necessary.
 Precautions
 Battery
Periodic Maintenance Chart
The scheduled maintenance must be done in accordance with this chart to keep
the motorcycle in
good running condition. The initial maintenance is vitally important and must
not be neglected.
Periodic Inspection
#: Service more frequently when operating in severe conditions; dusty, ...
Special Tools
Inside Circlip Pliers:
57001-143
Oil Seal & Bearing Remover:
57001-1058
Bearing Driver Set:
57001-1129
Jack:
57001-1238
Bearing Remover Head, 15 ×
17:
57001-1267
Fork Oil Level Gauge:
57001-1290
Bearing Remover Shaft, 13:
57001-1377
Fork Oil Seal Driver, 43:
57001-15 ...
Exploded View
EO: Apply engine oil.
G: Apply grease.
L: Apply a non-permanent locking agent.
Lh: Left-hand Threads
MO: Apply molybdenum disulfide oil solution.
(mixture of the engine oil and molybdenum disulfide grease in a weight ratio
10:1)
R: Replacement Parts
S: Follow the specified t ...